Step 1
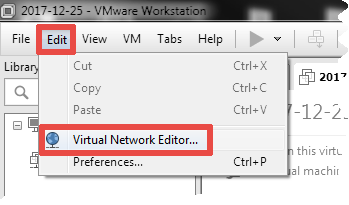
Open the Virtual Network Editor.

Step 2
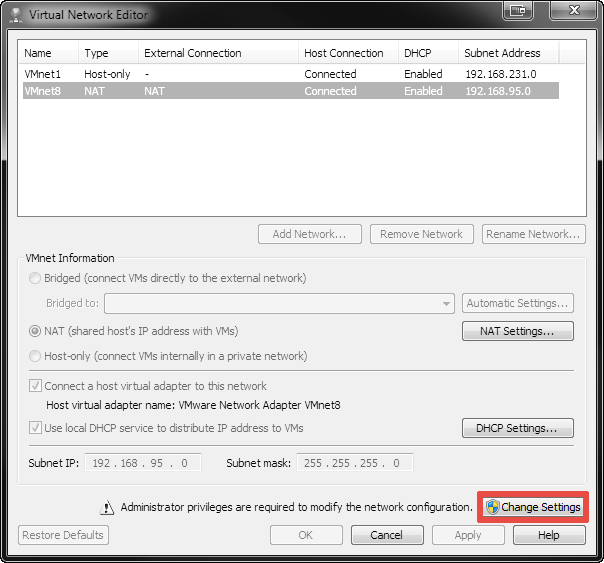
Grant your administrator privileges in Windows to the Virtual Network Editor by clicking the «Change Settings» button near the «Administrator privileges are required to modify the network configuration» message.

Step 3
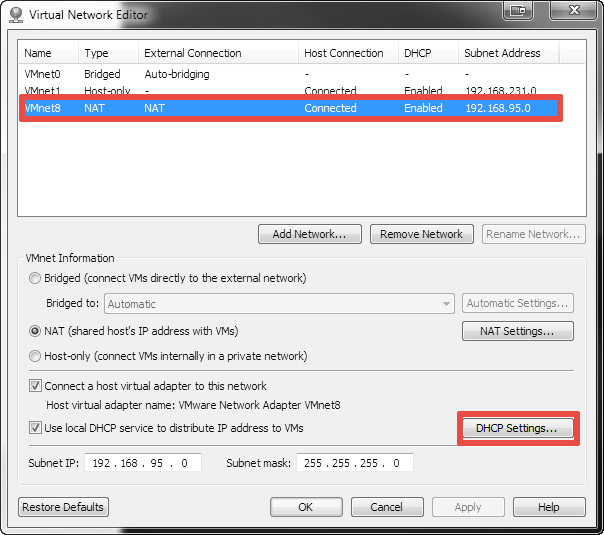
- Select the
VMnet8(NAT) virtual network from the networks list at the top of the dialog window.
- Click the «DHCP Settings…» button:

Step 4
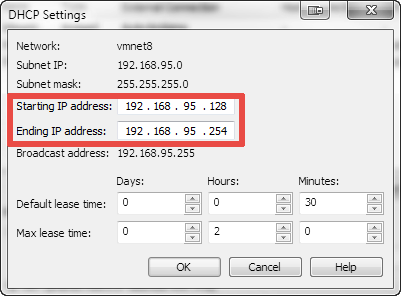
You will see the range of IP addresses that the VMware Workstation’s virtual DHCP service provides on the VMnet8 (NAT) virtual network in the «Starting IP address» and «Ending IP address» boxes:

See also: